What is a mockup?
Once upon a time, in order to evaluate their design, to demonstrate their work to a client, designers had to make layouts manually. That is, to see how the design of the movie poster would look, the designer had to print the poster. Or, for example, a designer creates a design for a box of chocolates, in order to look at the design “live”, the designer glued the box and printed his design on it. All this certainly helps the designer to understand how his work looks in real scale, to evaluate the proportions and colors, but it took a lot of time.With the development of technology, designers have realized that most of the work can be done faster and easier digitally on a computer. Flyers, posters, business cards, packaging, corporate identity, modern digital mockups can be used for all this.
How do designers use mockups?
Millions of designers around the world use mockups in their work. The use of mockups simplifies and speeds up the process of work, helps to evaluate your design in the process of work, show your design to the customer, arrange the project in a portfolio, visualize items for an online store, and mockups can also be used in advertising. Designers use mockups to show off their design, sell the product better, and surprise the customer.
What do you need to use a mockup?
To use the mockups from graphicfriends.com, you will need a few things:
- Program for unzipping downloaded files (winzip, winrar, etc.)
- Photoshop (minimum CC version)
- Basic Photoshop skills
Download mockup
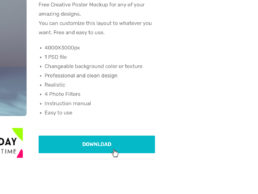
To start working with a mockup, you will need to download it from the site, as an example, you can use this mockup. Just click on the “download” button and save the file to a location convenient for you. It may take some time for the mockup file to load.
Unpack archive with mockup
Once the file has downloaded to your computer, you will need to unzip it. In order to do this, you will need a special program, one of the most popular is winrar, in my work I use it. Some operating systems have their own unzip program.
Read the "ReadMe" file
When the files are unzipped you will see several files:
- PSD mockup file (there may be one or more)
- PDF file with instructions, license and link to video tutorial
- JPG file with mockup preview (there may be one or more)
Be sure to read the ReadMe.pdf file with the license and instructions, this file describes where and how you can use mockups from graphicfriend.com
Open mockup
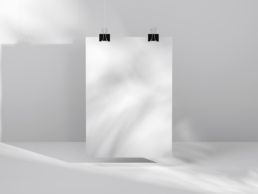
To open the mockup, double click on the PSD file, the file will open in Photoshop or any other program for editing PSD files (If you have Photoshop or any other program for editing PSD files installed).
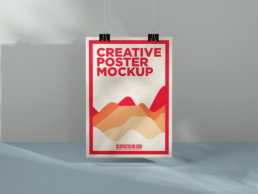
In the opened mockup file, you will see an example of a design project that I made to demonstrate how the mockup works, you just need to replace it with your own design.
Edit Smart Object layers
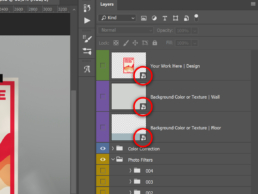
All design changes and modifications in an open mockup occur in the Layers panel.
All layers are named and arranged so that it is convenient for you to work with the mockup.
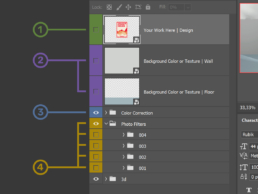
- Your Work Here – In this layer (or layers) is the main design that you can modify.
- Background Color or Texture – In this layer (or layers) you can change the background color or add texture.
- Color Correction – Layer (folder) in which there is a small color correction, you can turn off, edit or leave the color correction as it is.
- Photo Filters – Photo filters to help add mood and style. You can combine different photo filters.
The layers in which the main changes and modifications take place are called “Smart Object Layers”, they are easily recognizable by a small icon on the layer thumbnail.
For example, to change the color or texture of the background, you need to find the Background Color layer. As soon as you’ve found it, simply double-click on the layer’s thumbnail and a new window will open where you can change the background color or add texture. As soon as you change a color or add a texture you can close this window and save your changes.
In order to insert your design into the mockup, you will need to find the Your Work Here layer (be careful, there may be several such layers). Having selected the desired layer, double-click on the layer thumbnail, a new window will open in which you can add and modify your design project. Save your changes in this window.
Save mockup
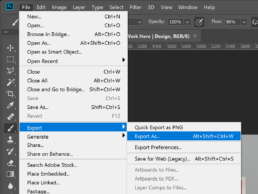
If everything is done correctly, in the main window of the mockup you will see your design project. It remains only to save the file. You can save the PSD file and also save the result as JPG to make it easier to show the result to the client, add it to the portfolio or on your website.
FREE STUFF
Don’t miss! Free design asset downloads!
Check back daily for a new free design asset!
LICENSE
Be sure to read the license. The license says how you can use files downloaded from graphicfriend.com
Thank you for your interest in my project with free mockups graphicfriend.com
I will be very grateful if you tell your friends and fellow designers about graphicfriend.com
All mockups on graphicfriend.com are made with love by me, you can download them for free and use them for commercial purposes.
Please see the license for full details.
You now in United States of America